Firmware
The firmware can be found at the GitHub Page.
The main stubs were generated using STM32CubeMX, and imported in CLion. We start by selecting the STM32F767ZITx - NUCLEO-F767ZI board. We set all peripheral options to their default values and enable the following modules:
- DAC (OUT1 and OUT2)
- USB_OTG_FS
- GPIO Ports for GATE and TRIGGER
Building and Running
JetBrains has quite an reasonable walkthrough for creating such a project. If you do not have a CLion license or are not willing to go through the additional pain of setting it up, you can just as well use STM32CubeIDE.
For Windows 10, I’ve found that the best combination of tools are:
- WSL for compilers (gcc-arm-none-eabi) and build infra.
- Windows for OpenOCD.
If you have everything set-up, you should be able to compile the project and flash it. For CLion, don’t forget to modify the Run-configuration to OpenOCD! 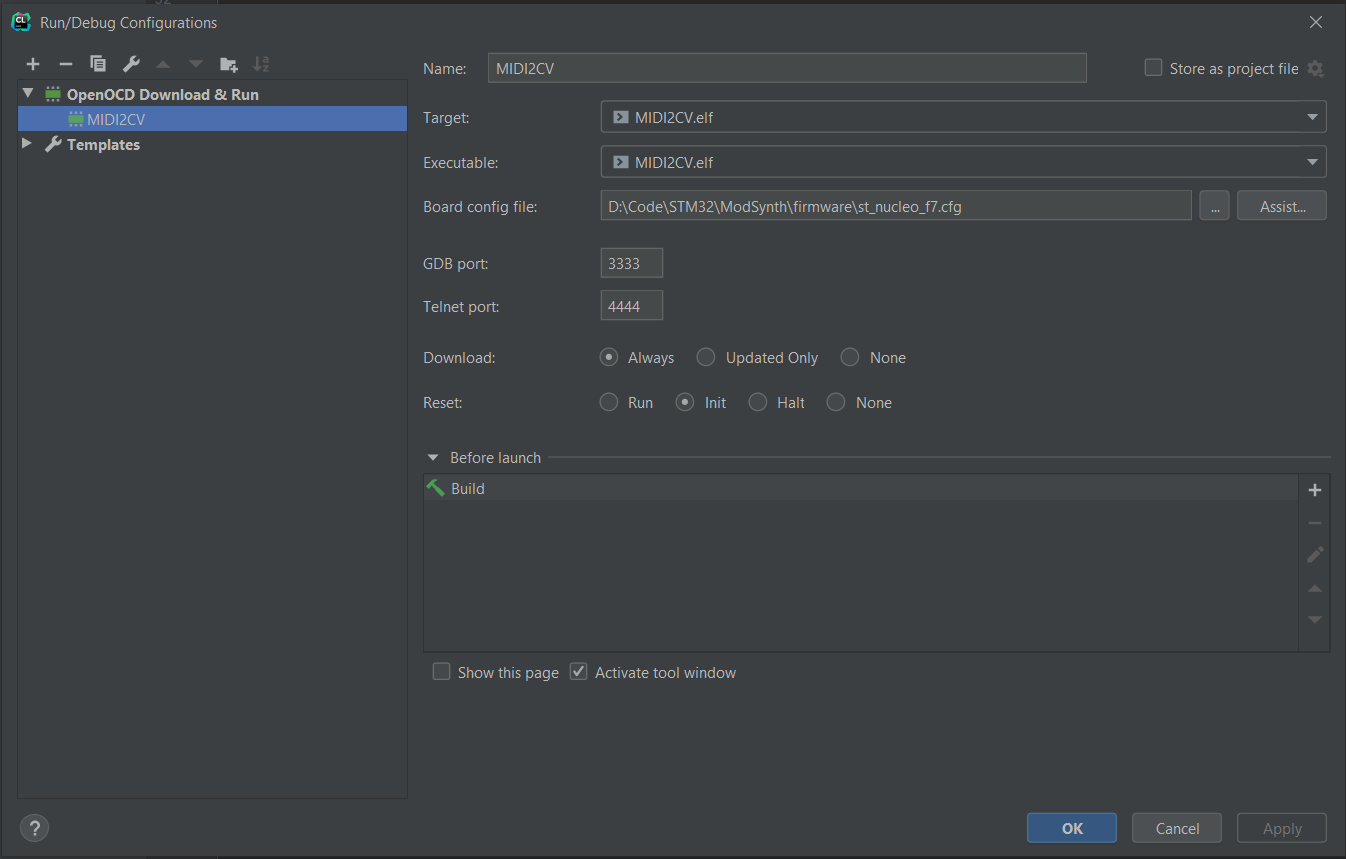 .
.
Verifying it works
First, make sure Windows actually recognizes your USB device! As the STM32 Nucleo manual states cleary: Do not power the device from the User USB!
Connect the ST-LINK side, and then the User USB side. Make sure you flash the program from your favourite IDE.
Note: When debugging, if you are in a breakpoint; stop and reflash or reload your firmware, Windows will often report that something is wrong with your latest USB device. For some reason I have not been able to track down yet, the USB Device driver responds with a bunch of 0’s, leading to an invalid USB descriptor. The workaround is resetting your device, unplugging the user USB connection and reconnecting it.
Open the Device Manager; The MIDI 2 CV interface should now be visible! 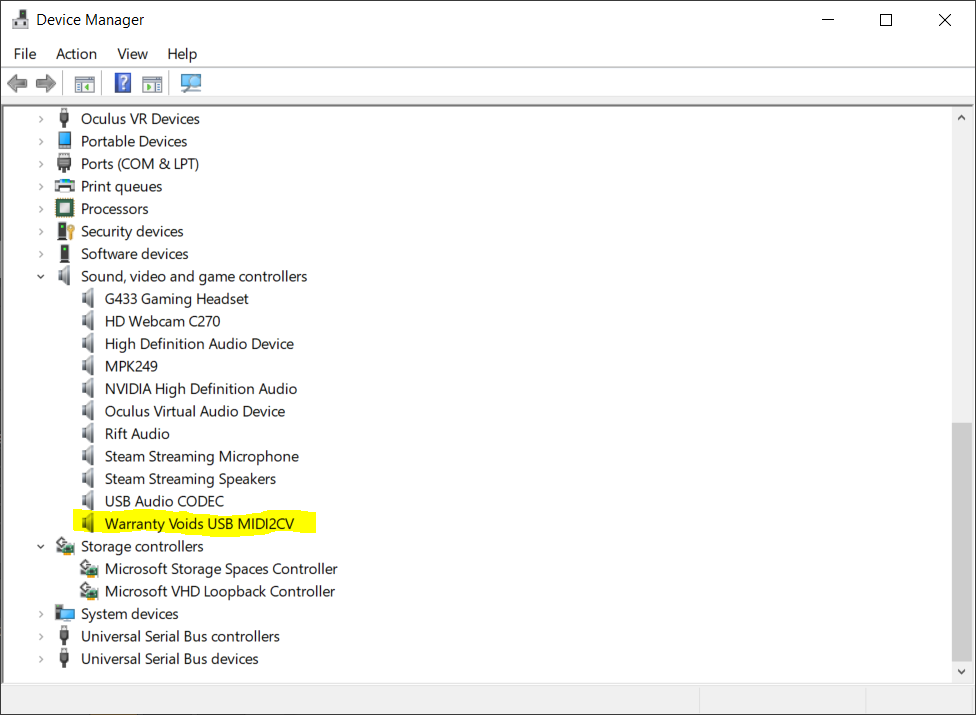
Open up Ableton Live, or Studio One (or your favourite MIDI editor). Set-up your MIDI device to send to the new USB device. 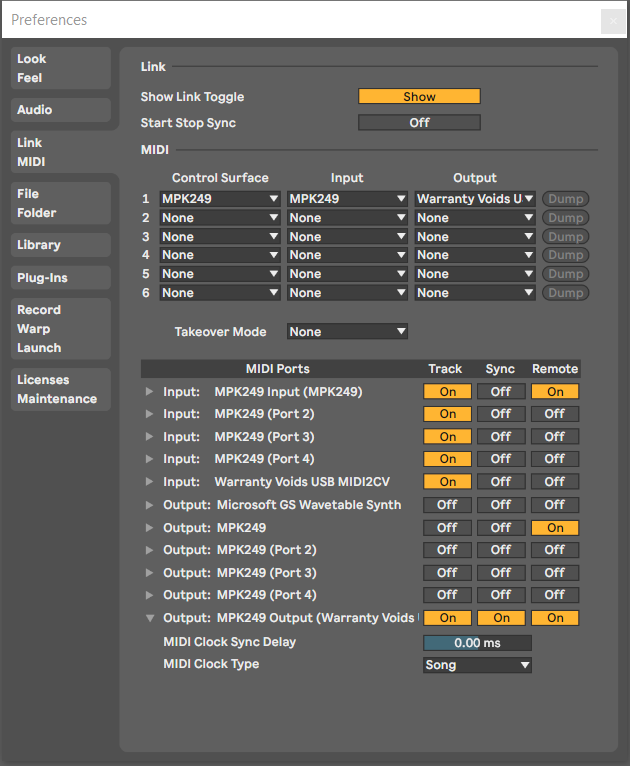

As soon as you press a key on your keyboard or MIDI controller, you should see a green light light up on the STM32 Nucleo!